
I will be installing some wood cups on my D2K’s, and will be making a guide for it! I wanted to note it all down and show my progress, so here it is!
Introduction
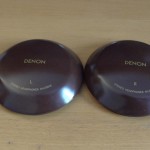
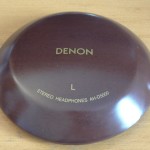
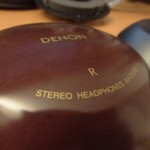
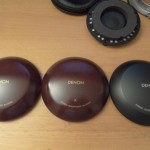
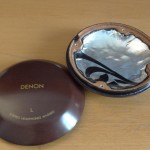
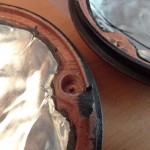
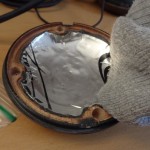
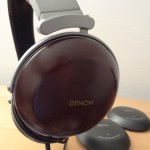
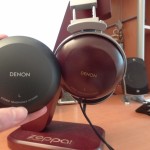
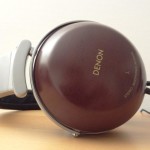
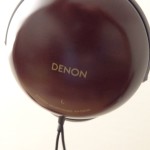
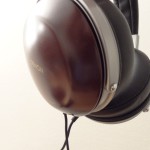
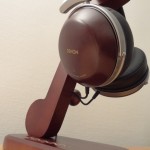
These Denon AH-D5000 mahoganny cups were bought from Mark Lawton, for a very reasonable price, over at Lawton Audio!
As you can see they come with the Xtreme Dynamat already installed, within the cup, which dampens the sound – a guide by Mark can be found over at Head-fi!
I will also mention the sonic characteristics that I notice being different. However, I bought the wooden cups mainly due to their amazing looks!
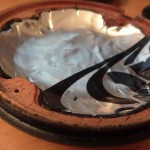
First of all here is my disassembly guide – which will help you in understanding on how to open your Denon’s up!
Drilling
It was a relatively easy process filled with a lot of trial and error.
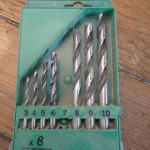
I didn’t want to over-shoot the drilling, as it would be irreversible, so I took my time testing from 4mm all the way up to 7mm, trying each drill bit (4,5,6), before getting to 7mm.
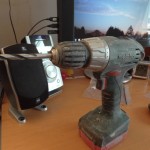
I was surprised 7mm was the one I ended up with – I initially thought 5mm would be fine. If you see the picture of the the drill and the drill bits, you can imagine my surprise picking up something so wide in diameter for something so small.
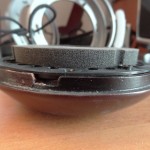
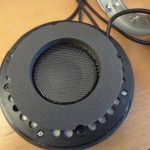
In terms of actually drilling, I inserted the drill piece directly in the middle, from the pre-made holes that were made for the D5K. This insured I would get a nice straight drill, and one that would be centred.
Whilst drilling, I went slowly in, rarely going to the full speed of the drills capacity. I also did a lot of stop checks – imagine it as quality control in a manufacturers line. As initially I didn’t drill that deep, and when I put the cups, after a little nip and tuck, they wouldn’t go fully down to the “lip” of the driver. So I re-drilled again, and was again surprised on how deep the hole went.


The best way to measure the depth is to see the driver, and the driver plastic bits sticking out – align your drill to go around that depth, if not a tad more – this should give you a nice snug fit. I felt that if I had also gone to 8mm, the snug fit wouldn’t be there, and I would be left with a partially loose D5K cup. The 7mm was a perfect drill size for the process.
Aftermath
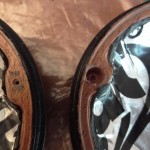
After finishing drilling, the holes didn’t look pretty, nor did my floor as a matter of fact. So when doing this, do it on something easy to mop up – luckily enough I have wooden floors so a quick hoover did the trick. If you have carpet flooring…I would do it somewhere else, unless you want loads of little mahogany pieces littered on your carpet.
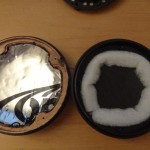
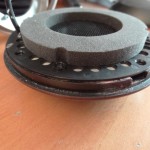
Now having drilled, the dampened material had almost, stuck to it, some wooden deposits over it. I grabbed an old sock (don’t worry it was clean!) and cleaned the D5K inner cup.
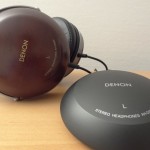
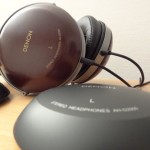
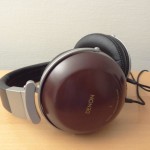
After finishing the clean-up job, I put inserted the cup on the driver, and to my surprise, even screwed in the screws that came with the D2K’s. Some of the screws even had to be force screwed, almost like the wood hadn’t been drilled deep enough to accommodate the D2K screw.
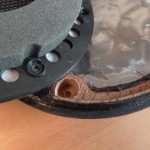
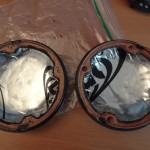
Finally, I added the screws of the frame-to-driver, and after a little fielding about everything was in place.
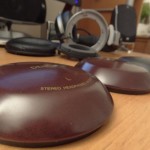
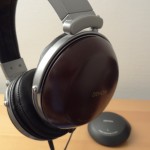
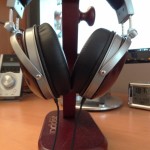
The final result is stunning. I can now just stare into my Denon’s knowing the work and patience I put in really paid off in the end.


Sound Quality Differences:
-Stock D2K cup
-Dampened mahogany D5K cup
So here was the real test – was there any sonic differences.
I do have to say that the HeadRoom graphs pretty much sup up the sonic differences.
With the D5K cups I got the following:
-Mids are a little stronger
-Highs are possibly a little bright
-Lows are definitely more present
-Soundstage is slightly better
-Decay is a little better
So overall, it was an improvement – I do however tone down (EQ) the highs bit a tinny bit – I’m talking about less than 1dB difference here – and it allows me to enjoy my music fully, without any sharp highs. (that said that could be my tastes!)


I hope you enjoyed reading this, and hope this helps y’all in your mods!
As they say, the only difference between the D5K and D2K is the cups and the wire, I can see why people would choose to buy a D2K and modify it. It’s much more fun to do so and much cheaper!
–TotallydubbedHD
Very interesting article, I’ll be sure to try this to mine.
I’ll keep you posted =)
~Robert
Let me know how it goes :)!
Strange, I took a closer look at the screw hole part on the wooden cups. and it seems to have a few wood chunks missing… this means that I wont be able to drill a hole completely. I guess I’ll have to figure something out, maybe shave down the plastic on the headphones themselves.
Not sure yet =) Don’t want to rush anything.
~Robert
What do you mean by wooden chunks missing?
Usually the wood cups should have a surplus of wood, in which you would have to drill.
The other alternative method, but isn’t reversible, is to cut off the plastic bits on the driver itself.
I’ll send you some pics of the wooden chunks missing. I’ll probably try the second method =)